

Posts by HomeyHomeWriter

How To Sublimate a Tumbler
Are you looking for a way to show off your art or design skills? If so, sublimation printing on a tumbler is the perfect way to do it! In this blog post, we’ll go over the ins and outs of how to sublimate a tumbler. We’ll discuss the supplies you’ll need, how to prepare the tumbler for printing, and how to get the best results from your finished product. So let’s get started!
Understand How Sublimation Works
Sublimation is a great way to create custom mugs, apparel, and tumblers! To get started, it’s important to understand how the process works. Sublimation is a process that turns ink into a gas and presses it onto a surface at very high temperatures. This process is more of an art than a guaranteed scientific success due to the various variables at work. To ensure a successful sublimation process on a tumbler, make sure to follow the manufacturer’s recommended time settings, use the appropriate inks, and ensure that your oven is heated correctly. With these simple principles in mind, you’ll be ready to create beautiful custom mugs and tumblers with sublimation!
Gather the Necessary Materials
Now that you understand how sublimation works, it’s time to gather the necessary materials. The supplies you’ll need include sublimation ink and paper, a tumbler, heat tape, parchment paper, and an oven. Make sure to double check that the tumbler is made with a polyester or polymer-coated surface; this is essential for the sublimation process to work. Once you’ve got all the items you need, you’re ready to get started!
Heat Your Oven
Before you can start pressing the tumbler for sublimation, you need to heat your oven. Preheat the oven to 400°F. This temperature is necessary for the transfer of the design to the tumbler. You should make sure that the oven maintains a temperature of at least 375°F throughout the sublimation process. If your convection oven has a TURBO feature on it, use that setting to ensure that the tumbler is heated evenly and quickly. Once your oven is preheated, you are ready to place your tumbler inside and begin pressing it for sublimation.
Place the Tumbler in the Oven
Once you have gathered your materials and heated your oven, it is time to place the tumbler inside. Make sure that the tumbler is lying flat and not standing upright. Set the timer for 6 minutes (or according to your glass manufacturer’s recommended time) and allow the tumbler to bake. When the timer goes off, the tumbler will be ready for you to press your sublimation transfer onto it.
Get or Prepare a Sublimation Design
Once you have all the materials for sublimating on your tumbler ready, it is time to get or prepare a design for sublimation. If you already have a design, you can use that. Otherwise, you can create a design using a photo-editing software such as Adobe Photoshop or Gimp. You will need a high resolution image so that the details of your design will be printed clearly. You should also ensure that the colors of your design are vibrant and are suitable for sublimation printing. Once your design is ready, print it out on special sublimation transfer paper. This paper is designed to absorb the ink from the printer and transfer it onto the tumbler without smudging or fading.
Print Out Your Design
Once you have the design you want to transfer onto the tumbler, you’ll need to print it out. To ensure the best possible quality for your sublimated tumbler, it’s important to use a high-quality printer and sublimation paper. Before printing, make sure that the design is correctly sized and oriented for the tumbler. Once everything is ready, print it out using your printer’s settings for sublimation transfers. After printing out your design, you can move on to pressing your transfer onto the tumbler. This will complete the process of how to sublimate a tumbler and give you a beautiful finished product!
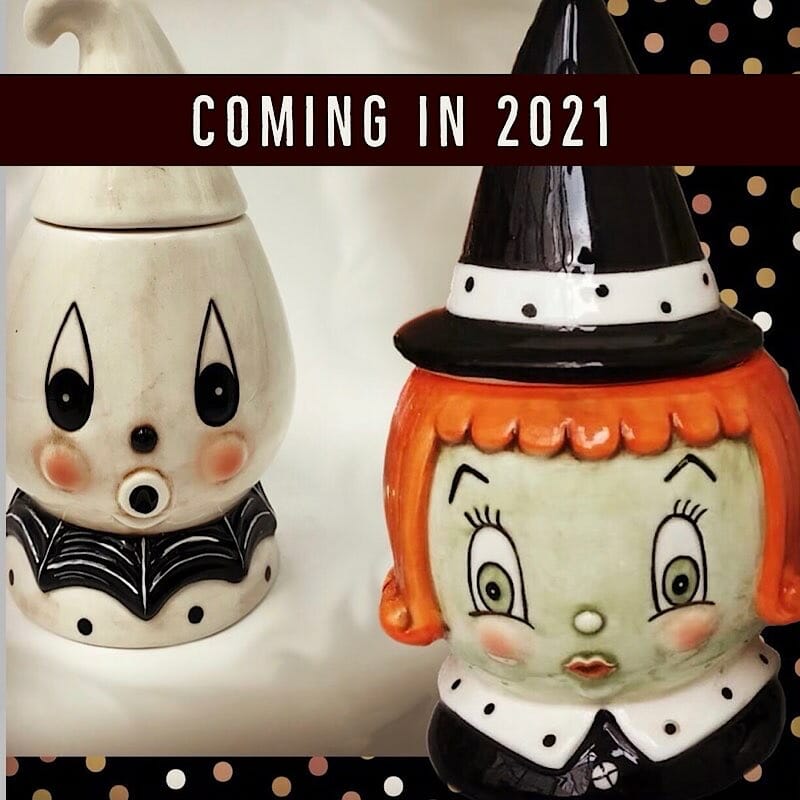
Johanna Parker’s Halloween Collection in 2021
There is currently a lot of anticipation for Johanna Parker’s Halloween collection coming in 2021.
Although many shops are doing preorders, we currently have no plans to do the same.
However, what we will do is this…
For our valued customers or subscribers…
you will be among the first to know when these products become available in our store!
If you would like to sign up for our newsletter, you can sign up from the homepage (scroll down to where it says “Sign up to our Newsletter”)
You can also sign up by going down to the footer of every page on the site under “Join Our Newsletter.”

Talk to you again soon,
Mari
Homey Home Decor
P.S. I recommend you whitelist our email to ensure our emails land in your inbox and you don’t miss them. You can do this by adding Homey Home Decor as a contact or adding our email to your VIP on iPhones.
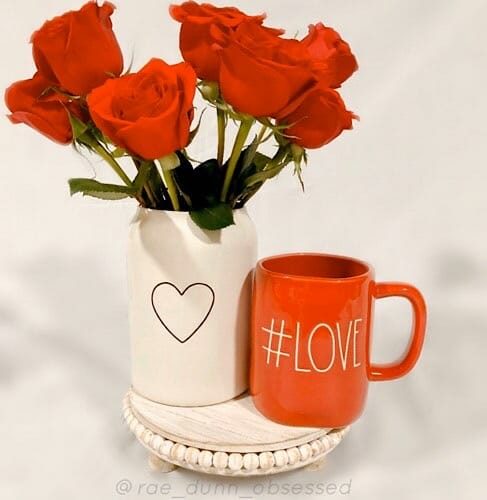
Valentines Heart & Love Mini Setup
Here’s a wonderful minimalist display setup featuring the Rae Dunn canister with heart embossed as well as the “hashtag love” red mug.
Removed the lid on the canister and added some red roses. This makes a simple yet beautiful display for this upcoming Valentines holiday.
If you want to give it a little extra visibility, you can always add a small platform to raise it up a little.
If you can’t find the hashtag love red mug you can also combine it with the Rae Dunn xoxo red mug. A red mug just gives it that extra touch and balance.

HomeyHome Decor Welcomes You
Welcome to HomeyHome Decor, a space for home decoration enthusiasts who primarily love farmhouse style decor to find ideas and get inspiration to help you decorate your home with beautiful ornaments, furnishings, setups, displays, ceramics, flowers, and everything in between.
As we mentioned, we love farmhouse decor! It’s one of our favorites. So we will be focusing on that. But we will mix it up a bit every now and then.
Seasons change fast and we will try to stay on top as fast as humanly possible. Feel free to send us your ideas, or point us to your social media channels and we might just feature your photos!
Thanks for visiting, don’t forget to bookmark the page so you can visit again soon.
 HTV
HTV